Configure the root user
By default the root user doesn’t have a password, you will need to set this. You can do this from PHP My admin, but it’s easier to use the client.
Keep in mind that MySQL actually has more than one root user, usually there’s at least two. You will need to change all of them.
Log in to the mysql server
1. Open the client from the shortcut on your desktop.
2. Type in the following
mysql -u root -p
3. press Enter
4. Press Enter again when it prompts you for a password.
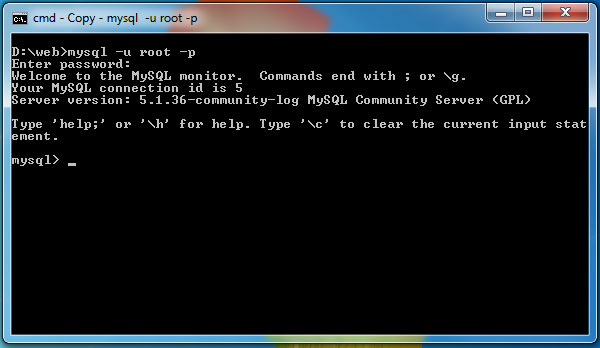
5. You are now logged in, it should look like this. . .
Change the root user’s password
It only takes two simple steps to change the root users password.
1. From the client type in the following.
UPDATE mysql.user SET password = PASSWORD('admin') WHERE user = 'root';
This will update all root accounts with an identical password. note the use of the PASSWORD function.
2. Right now the server still thinks that root user doesn’t have a password. We have to tell the server to re-read the user table and apply the changes. Type the following to do this.
FLUSH PRIVILEGES;
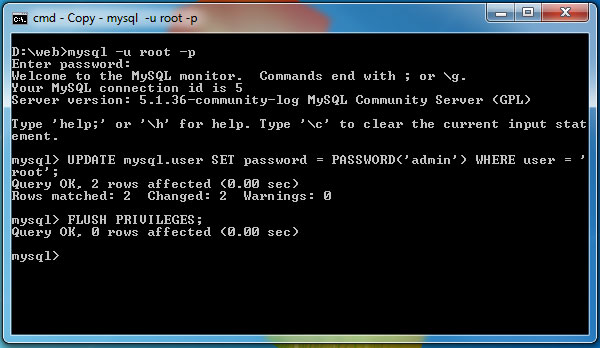
3. The command line client should look like this.
4. Next time you log into the server you should type “admin” (or whatever password you set) for the password.
Exit the MySQL server
1. To exit the MySQL server type the following.
exit;
2. You don’t have to do this but I like to start fresh and clear the screen by typing cls
3. The Command Line Client should look like this now.
Add a new user
On a development server, especially if it’s your own computer you’re rarely ever going to need more than one user, but for the sake of completeness I thought it would be appropriate to show you how to create a user.
Create a new user
1. Log into the MySQL server (see above).
2. type the following into the client.
CREATE USER newuser@localhost
This will create a new user and reserve it to a host. That way it only has access to one host.
Grant Privileges
MySQL has a complex and powerful privilege system, you can grant specific privileges such as just SELECT or grant all privileges like you would do for an administrator.
3. To grant specific privileges type the following:
GRANT SELECT, UPDATE ON *.* TO newuser@localhost;
4. To grant administrator privileges type the following:
GRANT ALL ON *.* TO newuser@localhost WITH GRANT OPTION;
5. These changes haven’t been applied yet so you will need to flush the system again.
FLUSH PRIVILEGES;
Change the password
6. This new user still doesn’t have a password, so like before you can do that with the following query.
UPDATE mysql.user SET password = PASSWORD('newpass') WHERE user = 'newuser';
7. Then flush the privileges again.
FLUSH PRIVILEGES;
Import SQL from a file
The client offers a convenient way to import data from an SQL file. It’s faster than PHPMyAdmin and also more reliable.
1. Copy and paste tutorial_db.sql into the directory where your files are being served.
2. Go back to the client and sign out of the mysql server by typing exit.
3. Clear the screen with cls.
4. Next type the following to import the data from the file.
mysql -u root -p < tutorial_db.sql
Notice the < character. This is called a Pipe character and it effectively “pipes” the data into your database.
Remember when we changed the Start In variable near the beginning of this tutorial? All files that you reference are in relation to this directory.
4. Press Enter
5. Enter your password and press Enter
If successful, the client should look like this.

6. You’ve now successfully imported data from a file!
Show information
Another handy tool is the client’s ability to show information. You can do this by using simple or complex SHOW and SELECT statements.
Show databases
1. Log back into the MySQL server.
2. Type the following
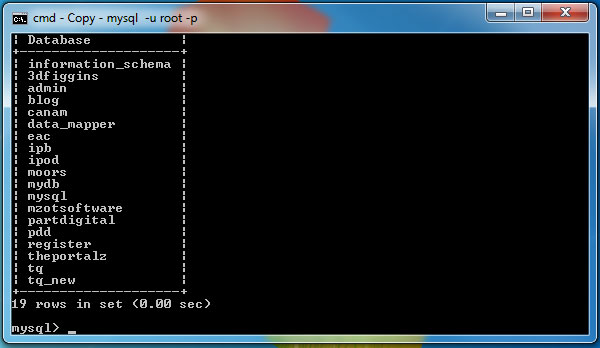
SHOW DATABASES;
3. It should look similar to this.
Connect to a database
You can quickly connect to a database so that all queries that you perform only affect that particular database.
\Type the following to do this.
use tutorial_db
Show tables
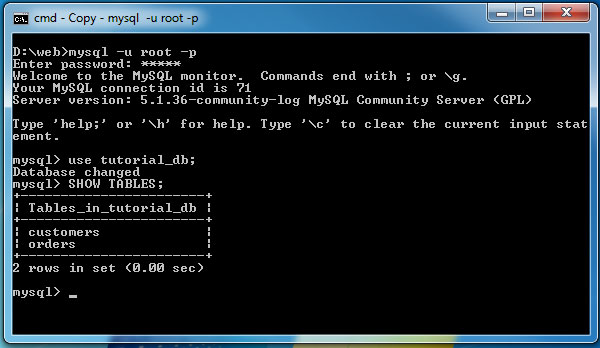
After you’ve connected to the datase showing the tables is a simple matter of running this single query.
SHOW TABLES;
Select rows
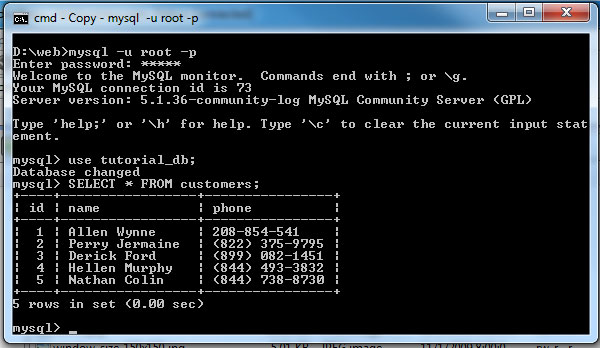
This is where the real power of selection comes. You can do any kind of query that you want and it will return a neatly formatted table of results for you.
Here’s an example of a very simple query.
SELECT * FROM customers;
You can also do joins
SELECT orders.id, orders.time, orders.quantity
FROM orders

LEFT JOIN customers
ON customers.id = orders.customer_id

WHERE customers.name = 'Perry Jermaine'
;
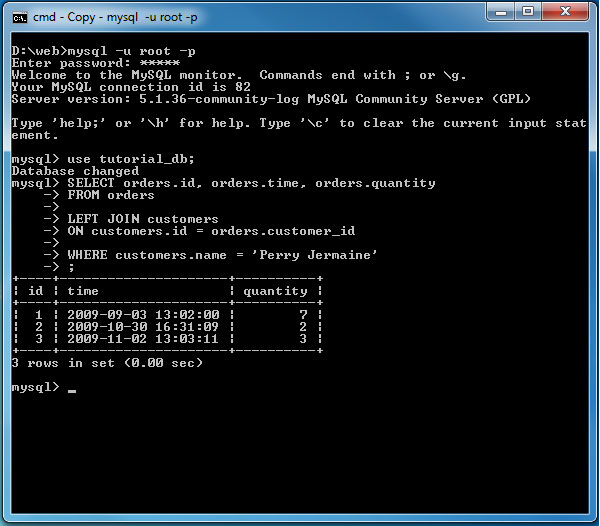
Tip: This is a very useful way to test out queries before you run them in the application. Especially if you’re going to be deleting rows.
Closing thoughts
We have barely scratched the surface with what you can do with MySQL and the command line client. I encourage you to play around some more with the client and see what you can do.
« Previous 1 2
Comments
Post by sammy on January 10, 2014
is it possible to create short cuts to specific commands used to work within a specific database. For example can I make a short cut that can be linked to an icon which would result in a search of my data etc. I've been trying for days to get an answer to this question with no success. Thank you for any help. Sammy Martin