In this tutorial I’m going to show you how to design a portfolio website and also introduce you to some of the
major issues that every web designer has to consider.
note: I’m not going to cover every detail bit by bit. It’s assumed that you have at least a basic understanding
of photoshop.
What you will need
- A paper and pencil.
- Adobe Photoshop.
Part One: Conceptualization.
What kind of website is it?
Ok so you want to make a website. . .but what is it going to be about? If you don’t know then making a website is impossible. Take out a piece of paper and a pencil and jot down a few ideas. Also think about what additional sections might be needed. For instance if you do a portfolio website, you’ll also need a contact page, and maybe even a news section.
Will your website grow?
Will this be a big website? If so, you need to consider the implications of growth. You’ll need to design it so that many people can access a wealth of information quickly and easily. You’ll also want to make it easy to add sections (while not affecting the content).
Branding
What about theme and branding? What impression do you want people to get from this? Do you want your website to be immediatly recognizable just from the look alone? Branding is a widely used stragegy in business, for instance the Apple computer company is recognizable in all their products by their elegant use of glossy white and smooth edges.
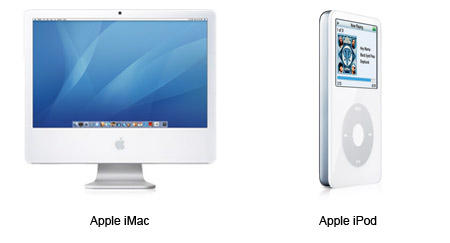
Also notice that they both share a similar name “iMac and iPod.” So not only are they branded through appearence but by name as well. Through this ingenius strategy they’re one of the most recognizable companies on the planet.
Who will be my audience?
What kind of people are going to be using your website? If you make a tutorial website like
pixel2life.com then it’s a fair chance that the majority of users will have larger monitors with modern browsers. In this case you could design your website to be larger and have some more advanced features (such as AJAX).
Take all these into consideration as you write down ideas for your website, it will make design and development much easier.
Part Two: What will your layout be?
In the web development world there a select few layout designs that have been considered the standard
One Column Layout
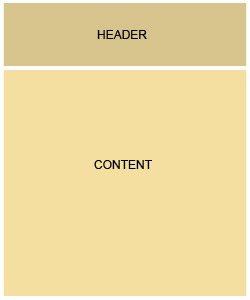
Advantages:
This is good at putting a lot of emphasis on one particular article or image. As a result this is best suited for galleries of images.
Disadvantages
This isn’t necessarily the best layout for a lot of information. If you have just a few pages in your website
then it’s fine but if it starts to grow and you get more sections then the limitations quickly become apparent.
Two Column Layout
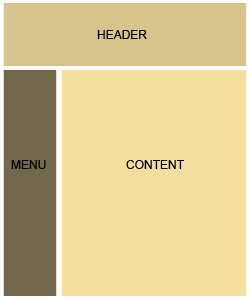
Advantages:
This layout is frequently seen throughout the internet, and rightly so, it’s an elegant solution for small to medium sized websites. With the navigation on the top and side it offers more opportunity for growth.
Disadvantages
There are still a few limitations however. Especially when you get into subsections. This layout only allows a maximum of 2 levels of depth. You also sacrifice real estate for your navigation.
Three Column Layout
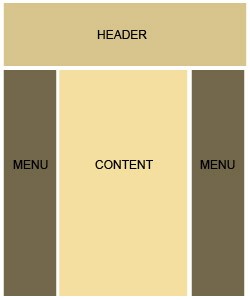
Advantages:
This is the most frequently seen layout in the web. With three different places for navigation, growth is almost
seamless. You can easily have up to three levels of navigation (which is the most you want anyway) and your eye easily drifts from one section to another.
Disadvantages
The biggest disadvantage of this however is things can get very cramped, very fast (depending on the size of your website).
Other Layouts
Obviously these aren’t the only layouts, try playing with four column layouts or something wild and crazy in flash.
Fluid or Fixed?
What kind of layout will this be? Fluid or Fixed? A fluid layout can adjust its size for any screen but has certain graphic limitations. A fixed layout is stuck at a certain resolution and my not be viewable on certain screens, but is much easier to design for. Think of your audience when you’re deciding this.
Part Three: Visualizing the Layout
Before I begin any work on a computer I sketch out some ideas on paper. This step is extremely important as it’s all about creativity. By sketching things out you don’t have to worry about any technical challenges beyond using a pencil. (If a pencil is a challege for you, you may want to try another tutorial first :p).
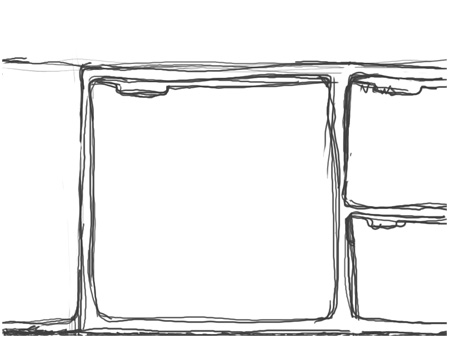
Sketch #1
This is my first sketch for the interface. I know I wanted a three column layout so I immediatly started with that. I liked the number of panels that I had but it still felt a bit off.
Sketch #2
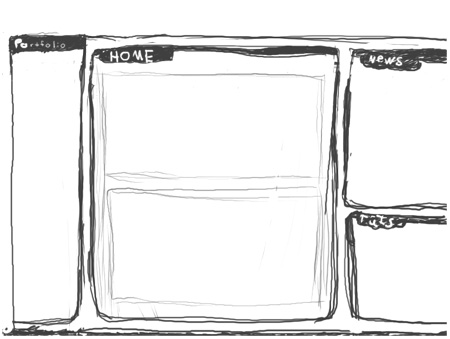
I kept working with that sketch to see if it developed into something I liked. The more I worked with it the more I liked the placement of the panels but the less I liked the rounded edges. I also felt that the portfolio section could be improved.
Sketch #3
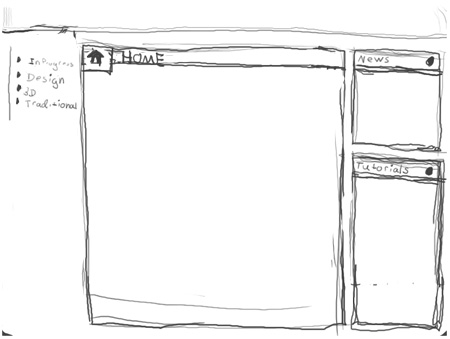
I started over on my sketch and finally came up with something I felt had potential. The portfolio section was greatly simplified and I sharpened the edges of the panels.
Sketch #4
Then I started to play with color composition. I hadn’t done much with light blue for a while so I decided to use that as my base.
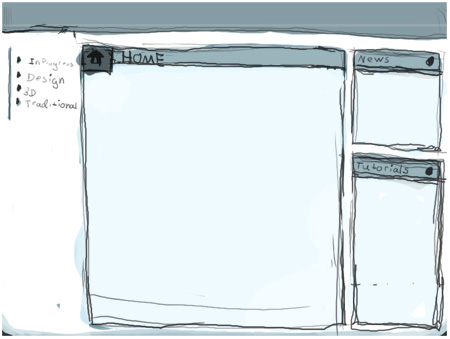
Notice that these sketches are very loose and there isn’t that much detail at all. All these are is a tool to get ideas flowing in my head. As I was doing this I was already making final decisions about how I wanted the final website to look.
OK, now let’s open Photoshop. . .
Part Four: The Body
Open up photoshop and make a new document. Set its size to the standard 800 x 600 pixels.
Press U to select the rectangle tool, make sure that the Rounded Rectangle Tool is selected. Set the radius to 10px.
Draw a rectangle from the top left hand corner of the canvas to the bottom right of the canvas. Don’t worry about the color, we’ll adjust that later.
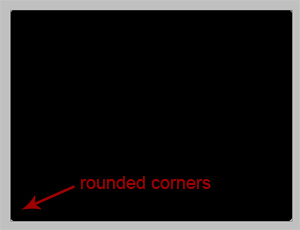
Change the Rounded Rectangle Tool to the Rectangle Tool. Click + on the keyboard (or click Add to Shape Area).Draw a rectangle at the top to remove the round corner. Note that the change of color is for demonstration purposes and yours will not look like that.
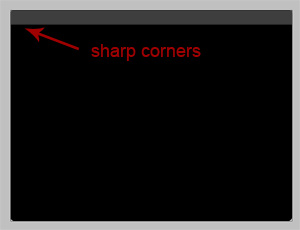
You should have a shape with round corners at the bottom and sharp corners at the top.
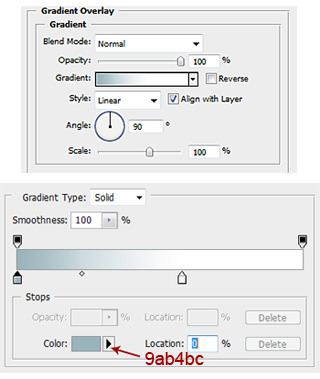
With the shape layer selected click the little F at the bottom of the layers palette to bring up the layer effects dialog. Click Gradient Overlay and apply these settings.
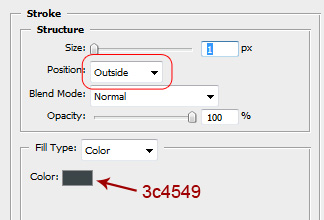
Click Stroke in the layer effect dialog and apply these settings.
It should look something like this.
Ok now lets add a footer.
Part Five: The Footer
Create a new Group in the layers palette, name it Footer.
Create a new layer in that group, name it Base.
With Base selected, Ctrl-Left Click the shape mask in the layers pallette to make a selection. Hold down Alt and drag a box to deselect to top portion of the shape. Fill that selection with 3c4549.
Draw a thin white rectangle shape over Base.
It should look something like this.
Part Six: The Header
For the header I wanted to make a slightly futuristic feel but also keep the feel of my current website.
Draw a rectangle at the top of the canvas and apply these layer effects.
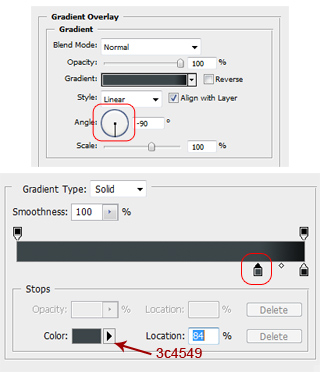
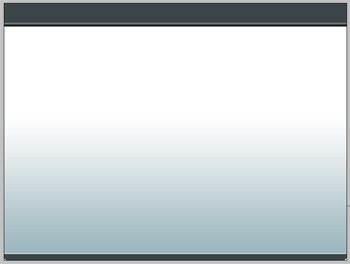
Then draw a thin white rectangle and set its opacity to 28% It should look something like this
The Icons
I’m not going to cover how I made every single icon, instead I’ll show you my technique I used for one and then you can use that to make your own :).
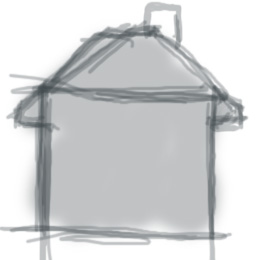
I started with a sketch first.
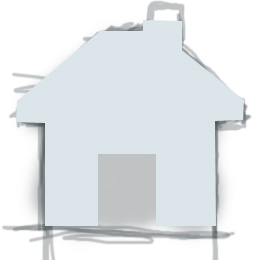
Then I added paths in photoshop.
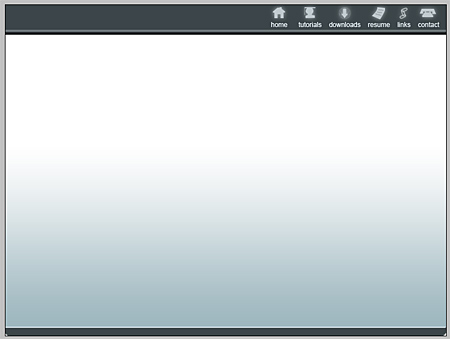
I pasted the image onto the header bar and added an outer glow filter.

With all the icons and text, it should look something like this.
The selected icon graphic was very simple, I just made a rectangle shape and applied these settings.
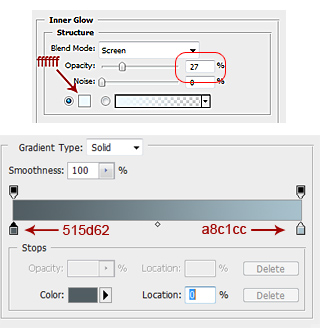
Then I drew a white shape on top of that rectangle and set its opacity to 14%
And this is what it looks like.

For the logo I already had the one that I made for my first website so I just grabbed that and resized it.
The font for the text was Arial. I also applied a light gradient to it. I’m going to leave this up to you. Have fun! :).
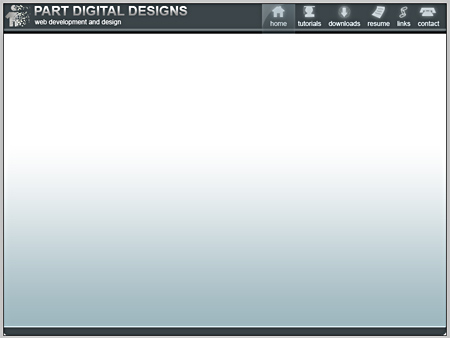
Your interface should look something like this now.
Part Seven: The Portfolio Menu
The portfolio menu is pretty straight forward. I wanted to differentiate the portfolio navigation from the rest of the site. I wanted the visitor to get the impression that this was a special navigation, separate from the rest of the site. I also wanted to keep it simple so that the user already knew how it worked.
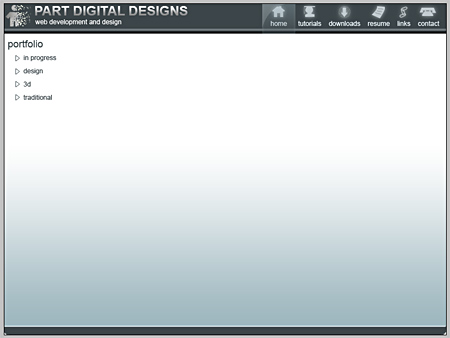
With the portfolio menu it should look like this.
Part Eight: The Content.
Create a new rectangle in the middle of your interface. Fill it with effaff and name it Panel Base.
Give it a 1 pixel stroke with a color 869ca4 Set its position to Inside.
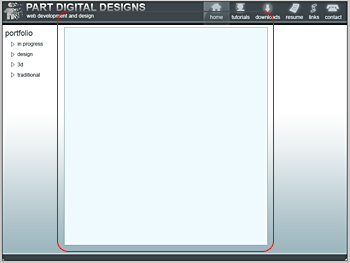
Create another rectangle.
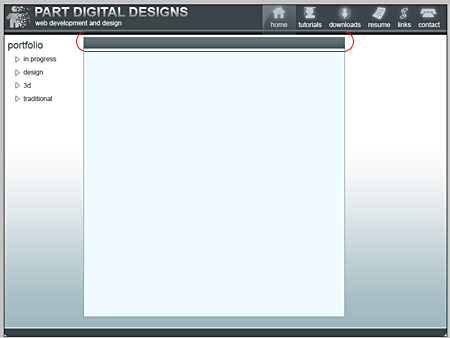
Give it these settings.
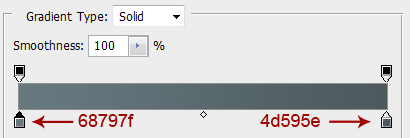
Add the text for this panel and then duplicate and resize it to match the picture below.
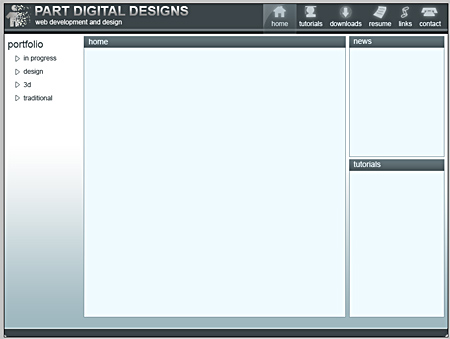
The content is what really needs to stand out from the rest. So in this case I made the natural decision to make the content the largest portion of the layout. I also put the largest and most colorful images in this section. Notice that the icon images for my projects are not only bigger but also have a slightly different design from my tutorial icons. This says discreetly “hey. . my tutorials are cool but what I really want you to do is check out my portfolio.”
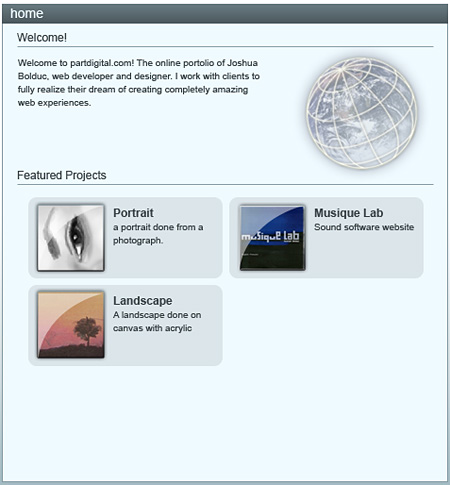
I really wanted the welcome section to stand out and I felt that text just wouldn’t do it by itself. So I made a globe surrounded by a wireframe to give it that “internet” feel.
A note about color
A good rule of thumb is to keep the color palette very limited. 4 or 5 colors maximum. I tend to pick a color theme (in this case blue) and use different saturations and brightnesses (is that a word?) of that color. If you’re lost as to what color scheme you’re going to use check out www.colorschemer.com he has great color schemes for you to play with.
Part Nine: The News Panel.
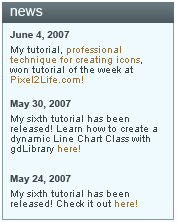
The News panel is very simple as you can tell. Just make sure that the date and the description are easily distinguishable. If you have any links in there, separate them out with a different color. I used orange. Isn’t it pretty?
Part Ten: The Tutorials Panel.
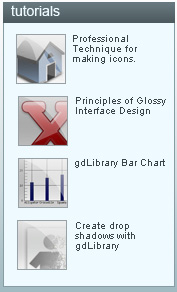
Another simple panel. I merely grabbed the tutorial icons that I made for my website and placed them inside the panel with their corresponding descriptions. When you have stock images like this it’s a good idea to create an icon template with all the styles saved so that you can simply apply it to the new image.
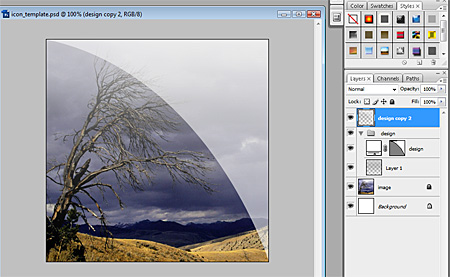
Icon Template
I created a PSD file with all my styles and graphics that I wanted applied to my icons. Then is was just a matter of applying it to my icons.
Part Eleven: The Result
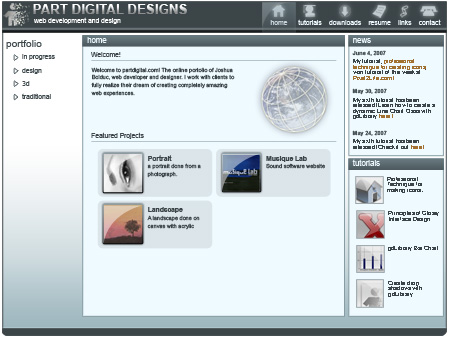
Put all these parts together and you get this!
Conclusion.
I hope this tutorial was helpful, feel free to post any comments or questions. (Or contact me directly).
Also I’m accepting requests. If any of you have a question about Photoshop or PHP and would like to see a tutorial, send me an email. Make sure that you put “request” in the subject.
Comments
Post by mika on June 19, 2007
great tutorial!i've seen a lot of tutorials teaching you how to get a specific layout but it was hard for me to get to work with my own ideas. this helped me a lot.thank you!
Post by santosh setty on June 19, 2007
good tutorial
Post by r1pp3r on June 20, 2007
I enjoyed reading it :) it also gave me some ideas to finalyse my own website.
Post by AGMJ on June 21, 2007
Great stuff thanks for the hint, from now on i'll do some sketching before anything . thx again!AGMJ
Post by Ajith Kumar on June 22, 2007
Great . Thank you very much for this tutorial. Can you post a tutorial on slicing a template in Photoshop?
Post by D Ogi on June 24, 2007
Super! Excellent! Great!Thank you! :D
Post by J^^ on June 25, 2007
well-explained! Tnx! I have a question, after creating the layout of the site using photoshop...how do u actually activate it? Like...with the links to different pages and putting it on the internet??? Sorry..totally a newbie on these stuff
Post by lhoy on June 26, 2007
wow great man youre not only good but great very powerful explanation helps me a lot, for a newbie like me youre so cool and the designs are awesome!!!! thanks
Post by dave on June 28, 2007
very nice. can i use the ideas you explained here for my own website? I will mention you as my 'creative director' :-) in hope for a positive answerdave
Post by Allen on June 28, 2007
Great Tut. A real pain in the a** to convert into slices for html. I think this style would work best for a flash page or a separate image for each page.
Post by Dang van bac on June 28, 2007
thank for your tut, this cool :D
Post by sipot on June 29, 2007
Gosh..we did u got the ideas from? Ur sketches r awesome! Fantastico!!
Post by lip on July 3, 2007
wow your explanation was awesome it helps me.. sir can you show a tuitorial on how to slice this and then put it all together again in dreamweaver im a newbie in this kind of stuff...thanks..
Post by benedik on July 13, 2007
omg! you are the best!
Post by gelandangan on July 23, 2007
Hi..i think your tutorial just genius..
Post by Abraxas32 on July 23, 2007
Yet another awesome tutorial! Keep up the great work!
Post by Arctic on July 25, 2007
Great tutorial. I utilized this to create my own portfolio, but i wish you would have gone more in depth on how to do the background for the rest of the page (since in larger resolutions theres a lot more space to fill) to make it look good, since i just did a plain color fill.
Post by Michaelea on July 26, 2007
I'm not getting Part 5 about the footer mask... I follow the instructions several times now but Ctrl-Left click doesn't make a selection for me and every time I go to the alt key and drag, PS always tells me "no pixels selected" Can someone please help me? I need more detail for the Step 5. I am using PS CS2 for Windows. Thank you.
Post by Michaelea on July 28, 2007
Got it now - Thank you. Fantastic.... Wonderful technique and instruction. A gifted professional indeed.
Post by somu on August 8, 2007
It is rely best tutorials thank you.....
Post by DocZayus on August 17, 2007
That was a sweet tutorial.Thanks for sharing !I will add a link to this on my blog:http://www.doczayus.com
Post by HTrance on September 8, 2007
Thanks for the tutorial, gave me new interesting insights...
Post by theGimp.. on September 16, 2007
Really a great tutorial. And what a beutilfull layout.. I did really learn something in this tutorial. Thank you!
Post by jamsa on December 6, 2007
Great work! Inspirational as well. Of course, we are all curious about how this gets translated into a working web page. Care to offer a tutorial on that? We hope so!Thanks!~j~
Post by shajed on December 7, 2007
good tutorial
Post by dj ritz ` on January 15, 2008
GREAT WORK! this was so helpful. and as others said inspirational! thanks for your time :)
Post by Micheli on January 17, 2008
I am having the exact same problem that Michaelea had. I am up to Part 5 and am confused by the ctrl-left click and alt instructions. I'm using CS3 extended. As I'm not yet very familiar with Ps, I would much appreciate more precise instructions on this part. Thanks in advance!
Post by Rohit on April 7, 2008
Superb job
Post by Rajesh Yadav on April 14, 2008
Tutorial is good .Its very helpful.Sir I want to send this jpeg(which created through gd libarary) image through mail
Post by peace on June 5, 2008
hi, sir the turtorial was very nice i liked it very much , but i would like to ask you 1 question. How to embade these things with HTML or php. How to create hyperlink with it and how to design rest of the pages. Can they work with CSS plz guide or is there any option in photoshop to generate HTML code.
Post by karthik on August 22, 2008
Tutorial is good .Its very helpful
Post by noobie :-) on October 26, 2008
i must say two thumbs up to this tutorial. especially for beginners on web designing. really great! More to come please..especially on php! Thanks!
Post by Freak on February 4, 2009
I also am stuck at part 5, I can't seem to select the footer part!
Post by Rolly on May 7, 2009
again... it is a very good tutorial...
Post by Adam on May 23, 2010
It would been great if you also could express how to splice it up, or how it should be splice up so it could been used in a html environment.
Post by admin on May 23, 2010
Hi Adam, please see this tutorial ;) http://www.bolducpress.com/tutorials/from-psd-to-html/
Post by Mohamed Hosny on July 12, 2010
Hello, First, Thank you so much for this tutorial. Second, I can't understand this part (Part Five: The Footer): With Base selected, Ctrl-Left Click the shape mask in the layers palette to make a selection. Hold down Alt and drag a box to deselect to top portion of the shape. Fill that selection with 3c4549. Draw a thin white rectangle shape over Base.